The rest is implemented as macros linked to buttons. Along the top row of CharGen are a number of buttons, most of which fill in or amend details based on the race, culture, occupation, and cults chosen in the first column.
The rest is implemented as macros linked to buttons. Along the top row of CharGen are a number of buttons, most of which fill in or amend details based on the race, culture, occupation, and cults chosen in the first column.
This Google Sheets workbook can be used to create characters using any of the basic cultures, occupations, and cults in the rule book, as well as any of the playable races in the Glorantha Bestiary.
The workbook is divided into three main sheets that are intended for the user:
CharGen sheet - this is where character creation is done, filling in dice rolls, rune choices, culture, occupation, cult, and skill choices.
CharSheet is the presentation sheet - laid out as a traditional character sheet, details from CharGen are filled in automatically using formulas.
History is for character family background, with drop-down selections for summaries of every possibly outcome of the yearly history charts.
The remainder of the sheets are lookups and working space that the formulae and macros use to store the technicalities that most users will not need to worry about. The one exception is the Translate sheet, where language translations are stored.
Much of the functionality is implemented as traditional spreadsheet formulas, such as derived attributes like damage bonus, strike ranks, and category modifiers, as well as rune bonuses to characteristics.
The rest is implemented as macros linked to buttons. Along the top row of CharGen are a number of buttons, most of which fill in or amend details based on the race, culture, occupation, and cults chosen in the first column.
Typical character creation workflow
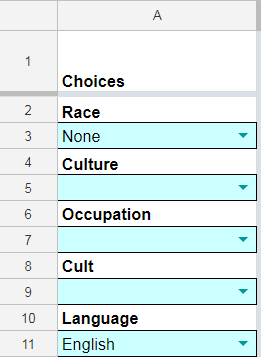
Pick a race
Pick Culture, Occupation, and Cult - these choices can be made later
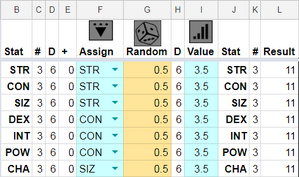
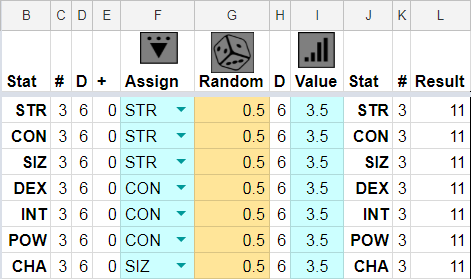
Click the "...▼" button in the "Assign" column. This fills in the correct number of dice and fixed additions for the chosen race. The dice for the default choice of "None" start out as 3D6 for all characteristics.
Click the button with the D6 image in the "Random" column. This generates random numbers below that are then translated into dice results in the "Value" column, in a range of 1-6 for most dice, but occasionally other dice for some races such as 1-4 for the CON die roll for Agimori.
Rolls can be re-assigned from one characteristic to another by selecting a characteristic in the "Assign" column, e.g. if you have a roll on a STR die that you want to assign to INT, then click on the drop-down and change STR to INT. This will result in too many dice for INT and not enough for STR, and this will be highlighted in red in the "#" column to the right. Fix this by assigning one of the INT dice back to STR.
The button on the Value column will sort the dice rolls so that they are grouped together again and in numerical order.
If you are using the "re-roll ones" rule, then for any roll that results in a 1 in the "Value" column, click on the value in the "Random" column and click the D6 button again. That will generate a new random value for that die. Sum totals are displayed in the Result column, and are replicated further across after the Runes.
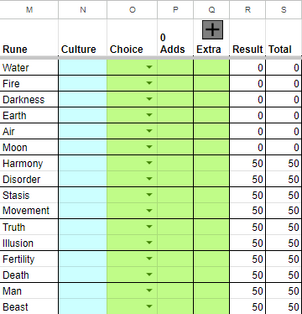
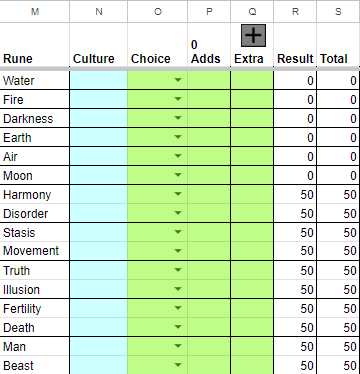
Assign numbers to your Runes, if you have chosen a Culture then any bonus for that will automatically appear in the Culture column. The Choice column allows you to select 60, 40, and 20 for elemental runes, and 75 for power runes. The values that you put in the Adds column are summed up in the column heading so that you can keep track of the 50 allocated points. There are no constraints applied to any of the values in any of these columns, so feel free to put whatever values you want as agreed with the GM.